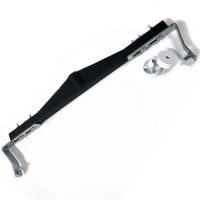
Diamabrush Concrete Polishing Tools Steps 1 thru 7
Description
Step One:
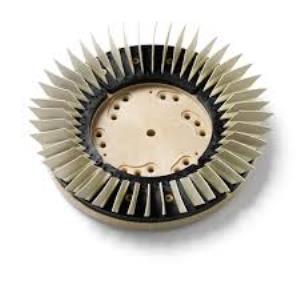
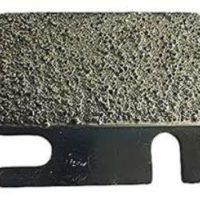
The first step in the Diamabrush Concrete Polishing System involves abrading the surface to prepare it for polishing. The Diamabrush Concrete Prep Plus™Tool consists of a super tough 25 or 100 diamond grit that is bonded to a metallic backing and assembled to flexible, steel spring blades. The flexibility of the blade helps ensure that the diamond insert remains in constant contact with the floor, regardless of imperfections to the cracked and damaged floor. This maximizes the effectiveness of the tool. As you use the Concrete Prep Tool Plus™ multiple layers of diamonds on the blades are constantly exposed, giving the tool a longer life.
Specially Designed Blade
The patent pending Concrete Prep Plus™ is specially designed to last up to 3 to 4 times longer (up to 50,000 sq.ft.) than our standard Concrete Prep Tool.can be refurbished by simply replacing the blades. The process is easy. Simply order a replacement kit, loosen two screws, replace the blade, and then re-tighten the screws. It’s just that simple.
Step Two thru Seven:
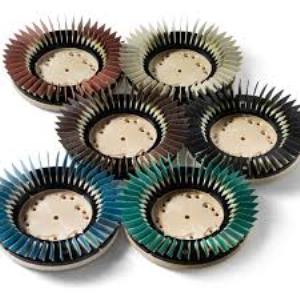
Use the coarse 50 grit Brown polymer and proceed as you would with your regular floor cleaning routine. After 6 to 8 passes using the 50 grit, the system progresses to the next grit. Grit progression is as follows; Step 2 – 50 grit Gold, Step 3 – 100 grit Black, Step 4 – 200 grit Blue, Step 5 – 400 grit Green, Step 6 – 1000 grit Red, Step 7 – 2000 grit Tan.
The system transforms ordinary cleaning machines into concrete polishing machines through everyday cleaning routines. No need for heavy, expensive equipment or harsh chemicals.
Progressing thru a series of increasing finer diamond grits, the pores of the concrete are progressively closed, ultimately resulting in a retail-like finish. Step 2 (100 Grit), Step 3 (200 Grit), Step 4 (400 Grit), Step 5 (1000 Grit), Step 6 (2000 Grit).
The multi-step system provides the flexibility for the user to choose how many steps are needed to achieve the desired surface finish.
Six Polymer Tools:
The Diamabrush Concrete Floor Polishing System depends on the use of increasingly fine grit polymer inserts. Just like with the Concrete Prep Tool, each Concrete Polishing Tool includes flexible blades that allow the diamonds to remain in constant contact with the floor.
The polymer blades are designed around removable, slotted retainers. Instead of having to replace the entire tool due to wear and tear, simply order a blade replacement kit. All polymers are easily removed and easily replaced, which enhances the life of the tool. Available in 12″, 13″, 14″, 15″, 16″, 17″, 18″, 19″, and 20″. Does not include clutch plate or riser block. Must be ordered separately.
Determining Diameters
Block Diameter: Lay the brush on the bristles, block side up. Measure the actual outside diameter of the block (not the bristle flare). See photo below for reference (measurement B).
Center Hole Diameter: Lay the brush on the bristles block side up. Remove mounting hardware, if any. Measure actual inside diameter of the center hole. See photo below for reference (measurement D).
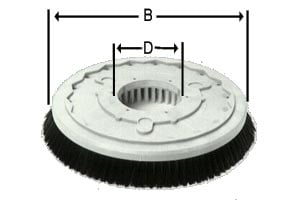
Once the correct size of brush and the proper clutch plate is determined, a few questions will enable you to select the correct type of brush or pad driver that is needed to fill your needs.
NOTE: Malish brushes are designed to fit each machine as shown, even though the block diameter listed on the charts may vary slightly from the diameter of the block originally supplied with the machine.
What is the make and model number of the machine?
When calling customer service toll FREE at 1-888-614-6584, please have the machine manufacturer and model number to help determine the block size, center hole diameter and clutch plate necessary to attach the block to the machine. If the machine size is not apparent from the model number, please provide this specification.
